DIY Tib Bar
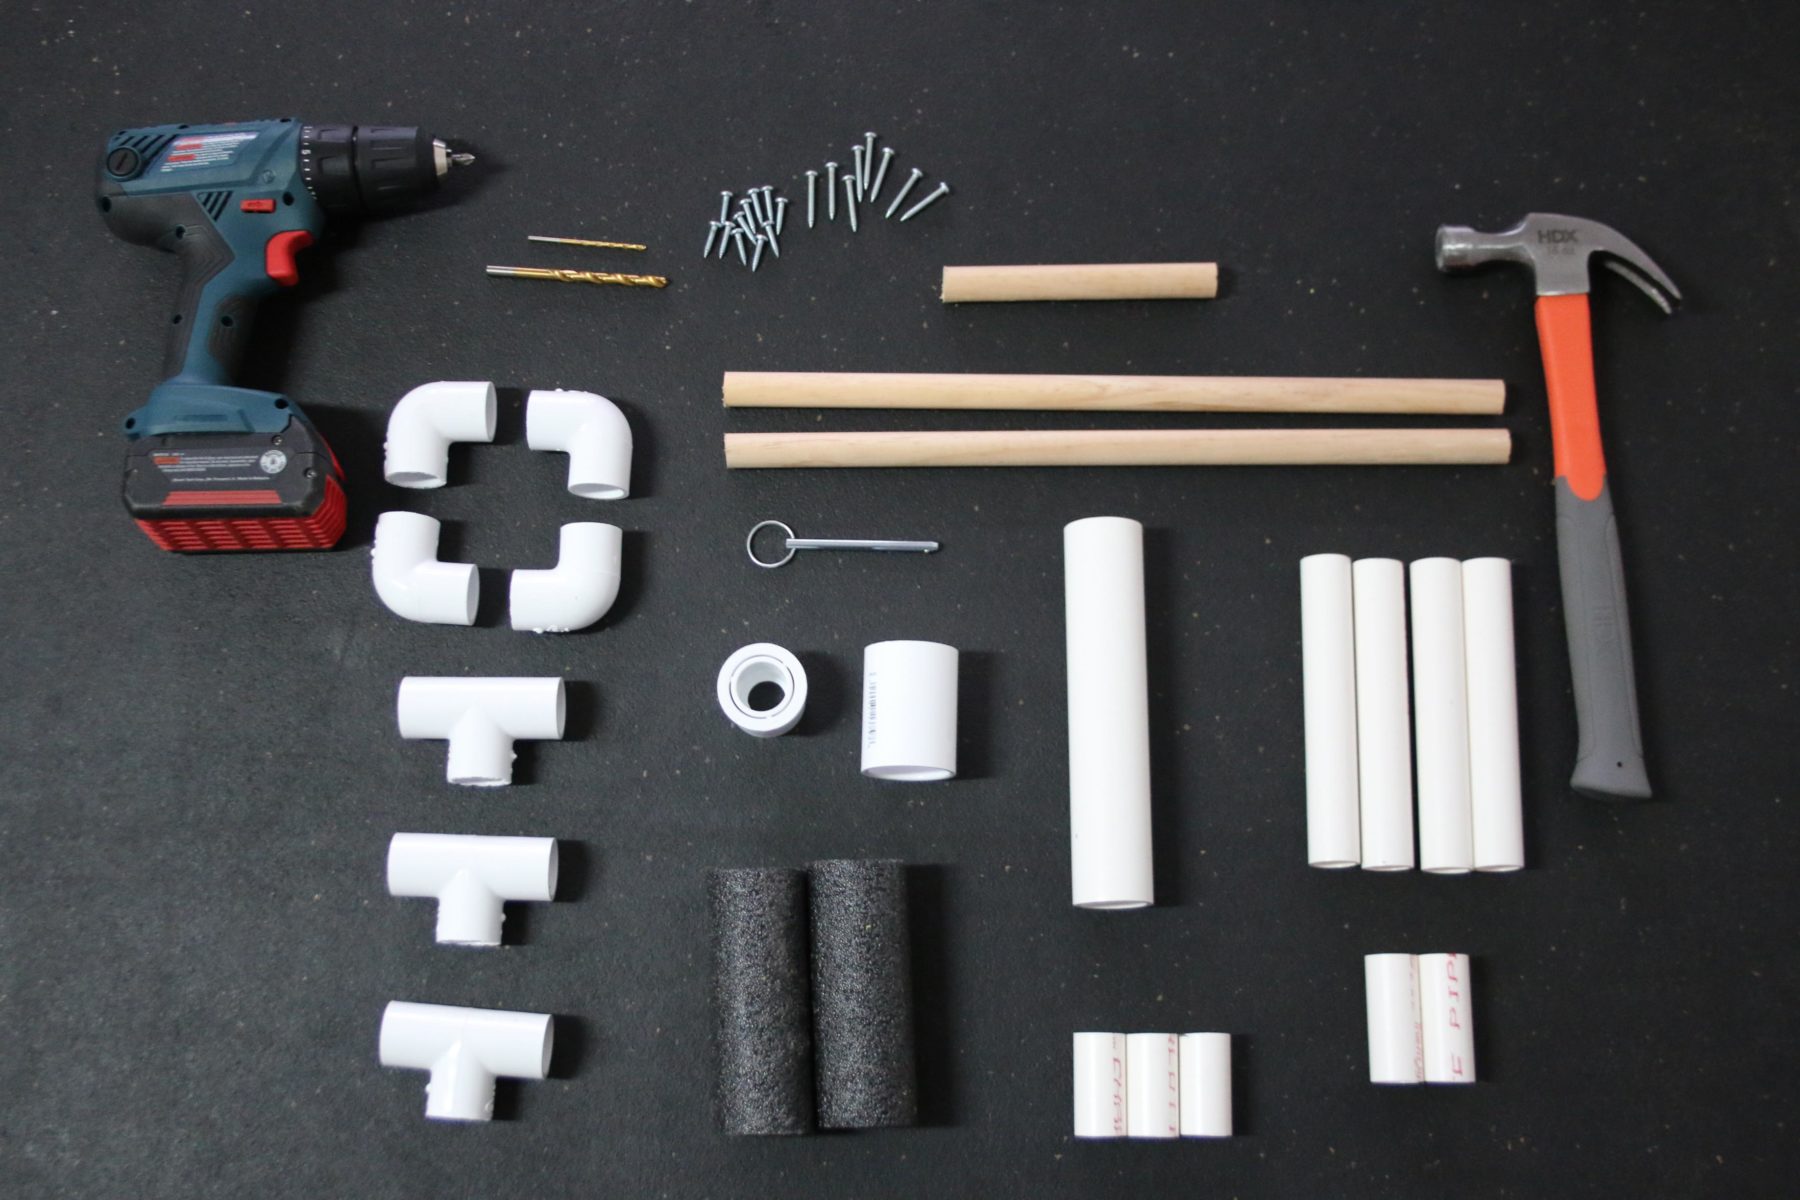
Materials
- (4) ¾” x 6.5” PVC
- (2) ¾” x 3 ¼” PVC
- (3) ¾” x 2” PVC
- (3) ¾” PVC T Joint
- (4) ¾” PVC 90deg Joint
- (1) 1 ½” x 8” PVC
- (1) 1 ½” PVC Coupling
- (1) 1 ½” to ¾” PVC Bushing
- (1) ¼” Hitch Pin
- (2) 17” Wood Dowel Rod (fit inside ¾” PVC)
- (1) 6” Wood Dowel Rod (fit inside ¾” PVC)
Tools
- Rubber Mallet or Hammer
- Drill
- ¼” Drill Bit
- 3/32” Drill Bit
Big shout out to The Pettie Project who posted the how-to video for this Tib Bar. If you are not much of a builder, you can purchase one already made from The Tib Factory.
Step 1
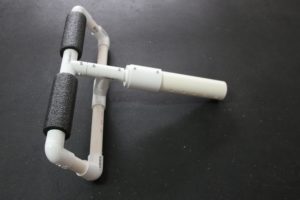
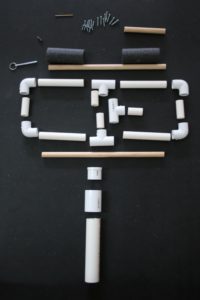
Layout your materials in the arrangement shown in the picture below. This is roughly how everything will fit together.
Step 2
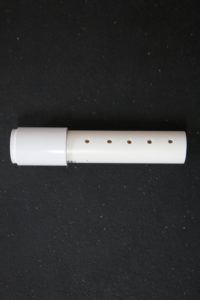
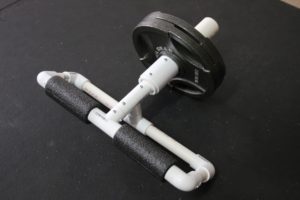
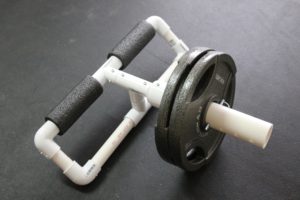
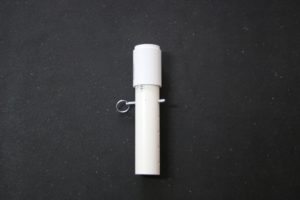
Attach the Bushing to one side of the Coupling and the 1 ½” x 8” PVC to the other. Drill ¼” holes about a 1 ¼” apart down the exposed length of the 8” PVC. I drilled them slightly less than 1 ¼” apart. A typical 10lb metal plate is about 1” in thickness, so I made sure the first hole could fit the plate, then the hitch pin.
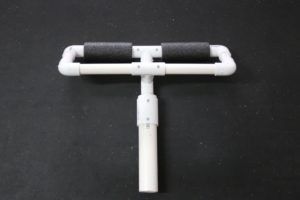
Step 3
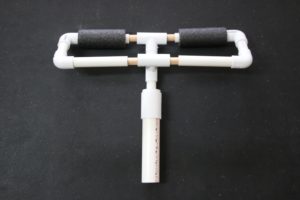
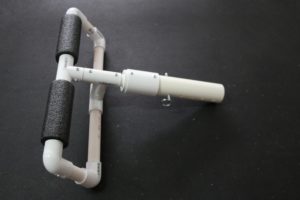
Connect all the pieces, as shown below, with the dowel rods running through the center of the PVC. The dowel rods are in place to provide extra support to accommodate higher loads. The 17” dowel rods run horizontally through the top and bottom braces (shown in photo) while the 6” dowel will drop down in the 1 ½” PVC all the way down to the end T joint where the foam insulation is connected.
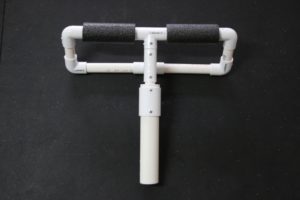
Step 4
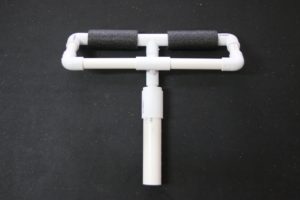
Drill 3/32” holes along the midline of the Tib Bar and add screws to solidify all the connections. The screws should go about halfway through the wood dowel rods to hold them in place. Use the appropriate length screw depending on where you are placing it — you don’t want the screw going all the way through the other side! I used ¾” screws everywhere except for 1 screw that went through the coupling, bushing and wood dowel, which required a 1 ¼” screw.